Theme Builder
This feature relies on the hooks registered within the Nectarblocks theme. If you are using a different theme, you will not be able to take advantage of this feature.
You can use Theme Builder to create templates which will be used to render the content of your Posts and Custom Post Types.
Archive Templates
in WordPress, Archive templates are used to display multiple related pieces of content together—what’s commonly known as an archive. These layouts power views like blog indexes, product category pages, and tag-based collections. For example, when you visit a blog and see a list of posts, you're looking at an archive page. Archives can be filtered by various criteria you're likely familiar with, such as author, date, category, search results, recent posts, tags, or other taxonomies.
Creating an Archive Template
-
Create a new template by going to the
Theme Builderpage in the WordPress admin. -
Give the template a name.
-
Open the
Templatetab in the right sidebar and select anArchivetemplate.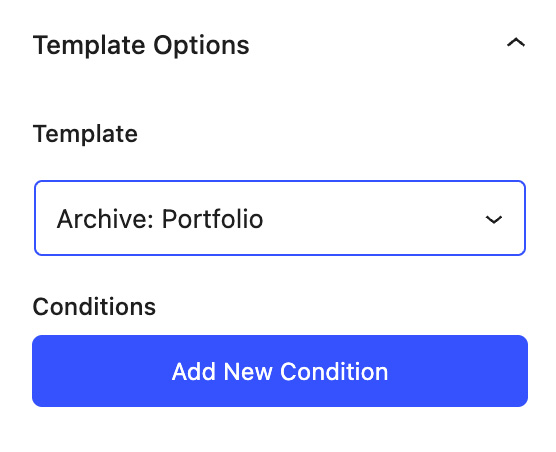
-
Add your desired content to populate the Archive template. The Post Grid block is the recommended way to display your posts in an archive context. You can combine static content with a Post Grid block to showcase your posts. Once a Post Grid is added, it will automatically inherit the post type selected for the archive template. As a result, the Query tab won’t be available, but you’ll still have full control over the layout and content of the Post Grid.
-
Publish the template.
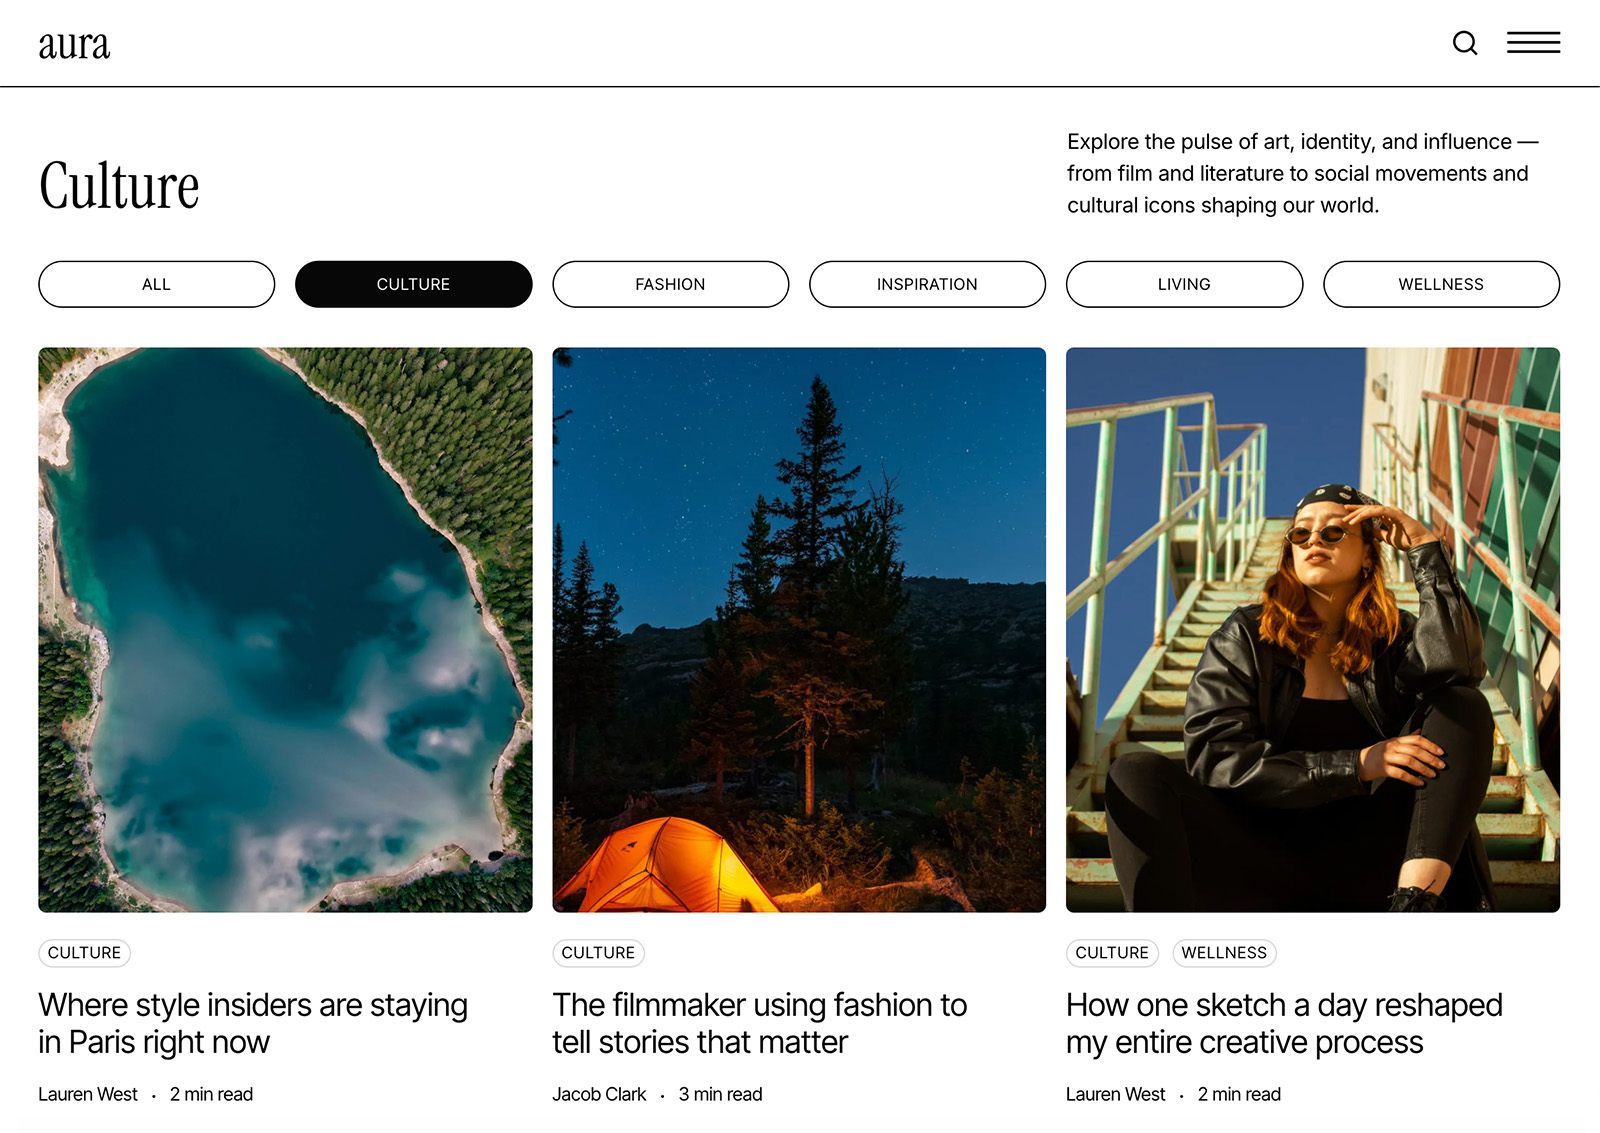 An example of an archive template is shown above utilizing the Post Grid block, Taxonomy Terms block, Archive Title block, and Term Description block.
Nectarblocks currently supports creating custom archive templates for the core Post post type as well as any custom post types registered on your site.
Single Templates
Single templates are the layouts used for individual posts—such as a blog article, a project, or a unique entry from a custom post type. They define how a specific piece of content is displayed when viewed on its own. Whether you're showcasing a portfolio item, or a custom post type item, this layout controls its presentation.
Creating a Single Template
-
Create a new template by going to the
Templatespage in the WordPress admin. -
Give the template a name.
-
Open the
Templatetab in the right sidebar and select aSingletemplate.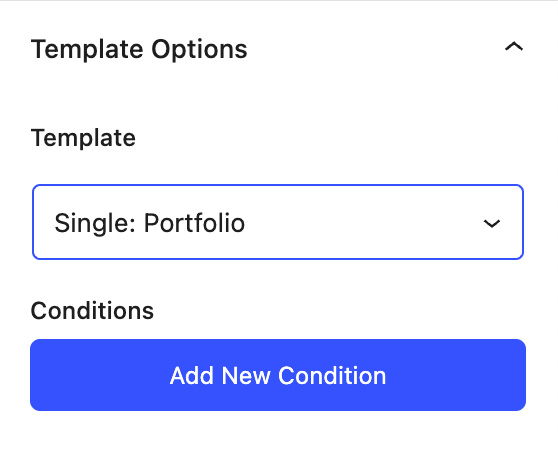
-
Add your desired content to populate the Single template. For Single templates, you can use any dynamic data type to pull content from the post. This allows you to create fully unique layouts with exactly the data you need.
In the editor, you'll see dynamic data fields displayed as placeholders when selecting data from the "Current Post" data type. This is because in the context of a template, the "Current Post" data type is referring to the post that will be displayed when the template is rendered.
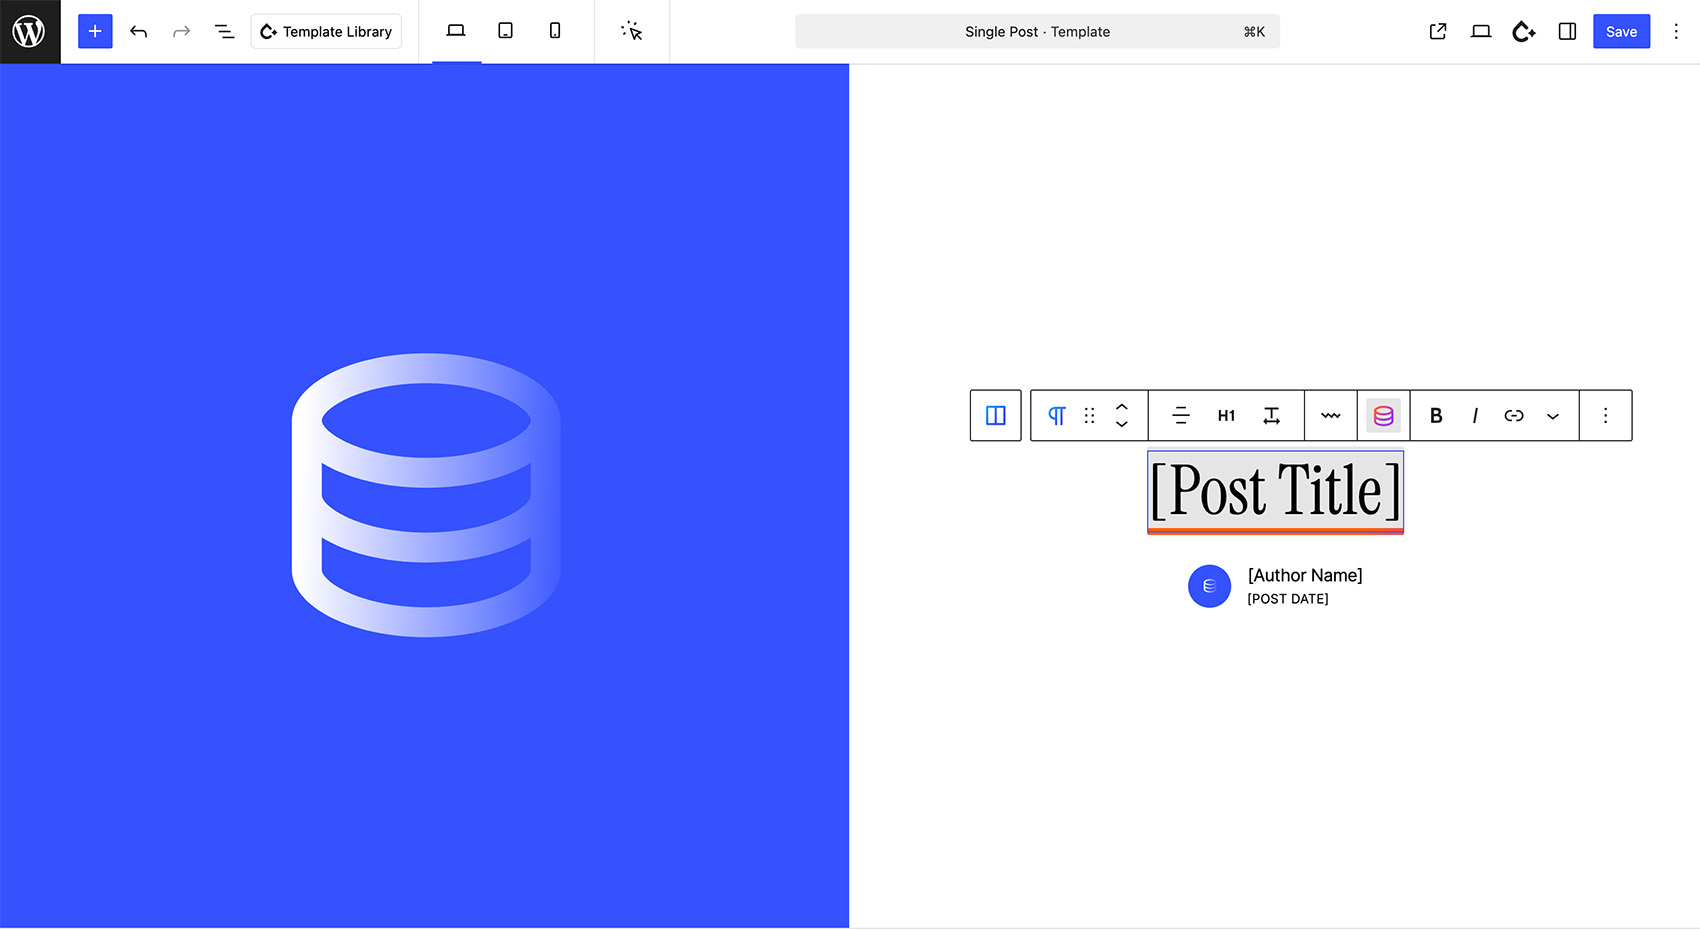 "Current Post" dynamic fields are displayed as placeholders in the editor.
 When viewing the single post in the frontend, the "Current Post" dynamic fields will render the actual content of the post being viewed.
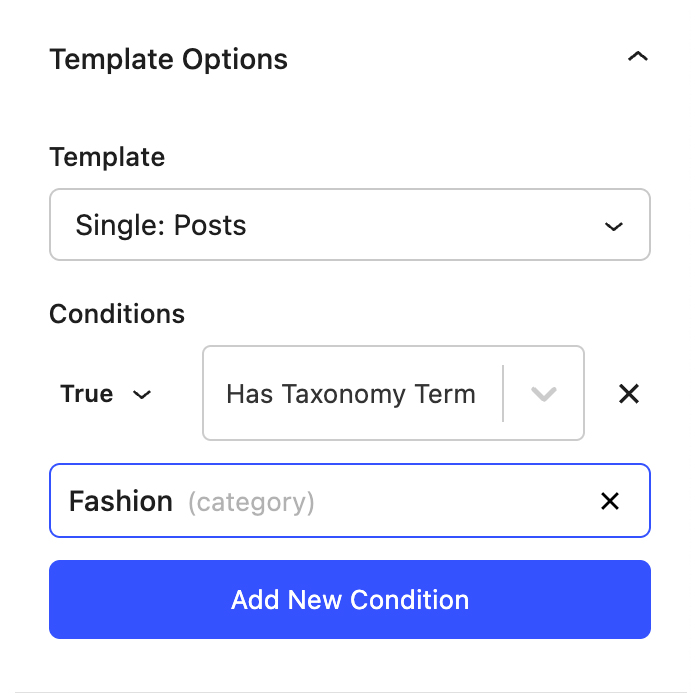
Display Conditions
Display conditions determine where a template is allowed to render. Every template gets its own condition set, so you can build different layouts for different contexts (e.g. one archive template for the “News” category and another for “Case Studies”).
Adding Conditions
- Open a Theme Builder template in the editor and switch to the Template tab in the document sidebar.
- Enable Display Conditions if they are not already visible.
- Click Add New Condition and choose whether the condition should include (
True) or exclude (False) the selected context. - Pick a condition from the dropdown. Additional selectors will appear for options that require extra input, such as picking a taxonomy term.
- Repeat for as many conditions as you need. Use the AND/OR toggle between badges to decide whether all rules must pass or just one.
Available Condition Types
- Everywhere – default catch‑all; applies when no other condition overrides it.
- Specific Post – provides a search field so you can choose a single post/page/custom post type entry.
- Is Taxonomy Term – matches taxonomy archives (e.g. category, tag, or any public taxonomy). Ideal for archive templates.
- Has Taxonomy Term – checks whether the current singular post is assigned to the selected term. Ideal for single templates.
- User Logged In / Logged Out – target templates based on login state.
- Post Type, Post Status, Author, Role, etc. – mirror the conditional logic available in Global Sections so you can scope templates to almost any context.
Tip: Some template types automatically limit the condition list. For example, archive templates cannot use “Has Taxonomy Term”, while single templates cannot use “Is Taxonomy Term”. This prevents combinations that would never pass.
Example Workflows
- Category-specific archive: Create two archive templates, each with an “Is Taxonomy Term → Category → News/Reviews” condition so each category gets its own layout.
- VIP single layout: Add a “Has Taxonomy Term → Membership Level → VIP” rule to a single template and mark it as
True, while adding the same rule markedFalseon the default template to keep audiences separated.